 Full Installation
BLIPS
Installation for New Sites Only
-
Warning:
Selecting ‘Full Installation’ option can
overwrite existing data.
If
the user has already entered data in BLIPS do not reinstall.
Use the ‘Upgrade’
option.
Installation
Summary
- Insert
CD
- Select
Installation
- Allow
installation to complete
- Details
of changes may be found in the BLIPS
Version 4.05 Release Notes
Detailed
Instructions
1.
Insert CD and allow a few seconds to auto-start.
If the CD does not auto-start, then use Start - My Computer
and locate the CD drive
Double click the BLIPS_40505_Aspreva.exe (Application)
2.
Select the following Menu Options :
a.
Installations
b.
I agree (Network)
c.
I Agree (Licence)
d.
Full Installation
e.
Version 4.05
f.
OK
g.
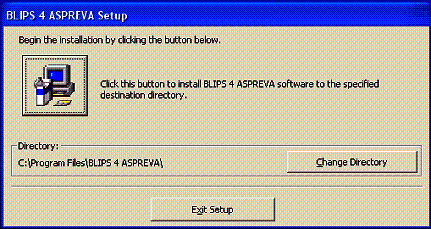
Directory:
Ensure
that the installation will be installed to directory:
C:\Program
Files\BLIPS 4 Aspreva\

Note: Non–English computers may default to other locations,
If
this occurs, use
Change
Directory to set C:\Program Files\BLIPS 4 Aspreva\
If C:\Program Files\BLIPS 4 Aspreva does
not exist this file can be created by clicking on change directory and creating
new file.
h.
When Directory: reads C:\Program Files\BLIPS 4
Aspreva\ the click the large square button with the computer icon to
install
i.
Choose program group: Default is BLIPS 4 ALMS, Click ‘Continue’.
j.
Version Conflicts Message : (Note :There may not be any)
k.
Select Yes to keep existing files if any conflicts exist
l.
Note:
When Upgrade has been completed, after logging into BLIPS, a new registration
will be required. Please complete
registration form and send back to ADS-Limathon (fax number and email address
provided on registration form). You have 21 days to register.
| 